instagram twitter pinterest bloglovin email

Sidney Yao

  • HOME
  • ABOUT
  • DESIGN
  • GAMING
  • LIFESTYLE
    • WEDDING
    • BEAUTY
    • BABY
  • Contact


After spending some time collecting a bunch of high-res Eric Carle animal drawings and patterns, mainly from his Facebook Page and Instagram, I put together a set of ABC Animal Flash Cards for Lucas. I will add to the set as I collect more resources. 

FREE DOWNLOAD HERE

Here are some printing and DIY tips: each card is 10cm*12cm, so you can fit 4 on an A4. I used a thick matte paper stock (180gsm) and printed double-sided. If you are using normal A4 paper, I don't recommend printing double-sided as the colours will bleed through. 

I recommend using a Paper Trimmer/Cutter instead of Scissors to save effort. 


It's also essential to use a Corner Rounder so you or your bub don't get hurt from the sharp edges. 


You can also laminate the cards so they last longer, but since I prefer the matte finish I did without. You can download the flashcards here! Hope you have fun with these and your bub enjoying learning with these fun and colourful flashcards, happy DIY-ING!
Share
Tweet
Pin
Share
No comments


I don't know about you, but the Lockdown life has definitely got me reminiscing about all the past trips I've taken. One of the most memorable ones would be the intimate nature-based experience with CABN.  

Late last year in celebration of hubby and Loki's birthdays, we went off the grid in a tiny house (Allira) hidden deep in the beautiful Yarra Valley. The experience is something between glamping and camping, which offered us the perfect balance to enjoy nature, roast marshmallows around a campfire, and still sleep comfortably (on a Queen-sized bed) and not worry about setting up a tent. The tiny house is wonderfully designed with a sustainable system to include rainwater basins and solar energy. It offers a tiny life with its interior, main floor and mezzanine beds, mini-kitchens, dining area and large glass windows to stay in touch with nature. It even came with an outdoor barbeque! But the most important part is CABN is pet-friendly so we could bring our fur baby along. We absolutely enjoyed the nature immersion and can't wait to go back. We're so glad to also have taken some great family photos there including a special one to announce my pregnancy! (I was 4 months pregnant at the time)

If you are thinking about booking a trip, my recommendation is to bring gumboots/walking shoes, food to cook with, a good book/your favourite board game, mozzie repellant and a sense of adventure!


Share
Tweet
Pin
Share
No comments


Long time no see.....and SUPRISE! I AM A MOTHER!! I had my baby Lucas on 1st April and I can't believe it's already been 3 months with bub. Motherhood is so much more exhausting, rewarding, confusing and amazing than I could ever imagine or prepare myself for, and I'm loving this new role. 

Without getting too much into my pregnancy and birth stories, I really wanted to share some of the awesome baby products that I lived by and really helped me get through the first 3 months. I'm not going to cover things like diapers, baby formula, dummies or bottles, although I'm more than happy to share those if anyone's interested. I understand every baby is different, so what worked for me might not work for other people. But here are my Top 10 Holy Grail Baby Products (Newborn 0-3 months). Everything is outlined below including the reasons for choosing each item and where to purchase them.

Spectra S1+ Double Electric Breast Pump

link to purchase

This hospital-grade breast pump comes with all the features you'd need, including double pumps, adjustable strengths/settings, night light and portability, which to my surprise is super needed even at home! It's also super quiet, charges fairly quickly and the battery lasts a long time. I honestly can't fault this product and no wonder it has hundreds of 5-star reviews online. It has made my pumping so easy and as enjoyable as possible. I'd highly recommend this to any pumping mums.

Bennie the Bear Light & Sound Sleep Aid

link to purchase

It's more like Bennie the Savior! Lucas absolutely loves this! He loves the warm orange light on the bear's tummy and can stare and smile at it for a long time! This thing is pretty genius, it detects sounds and plays Brahms Lullaby when Lucas cries. The music can easily mask some of the noises we make doing things around the house so Lucas doesn't wake up. It can also play soothing rainfall noises and heartbeat mimicking pre-birth sounds. If I had to rank the things on this list, Bennie would make it in the Top 3! We seriously can't live without Bennie!

Snuggle Me Infant Lounger

link to purchase

The next best thing to being held in your arms is sleeping in The Snuggle Me Lounger. This little sleeper is like a hug for your newborn. Its unique curved shape is designed to hug your baby's full body. Lucas is a baby who never wanted to be put down yet he’d sleep like a champ with the calming and snuggling sensation from the Snuggle Me. We live in a double-storey house and this has also served as a great daytime sleeping lounger for downstairs.

Love To Dream Swaddle UP Sleeping Bag

link to purchase

Even though I do a mean swaddle, Lucas simply prefers sleeping with his arms up and hands near his head, so the LTD sleeping bags are the perfect solution! It's a genius way to let your nugget self-soothe and keep them in their preferred position while staying cozy. It also helps with newborn startle reflexes. I will definitely continue to use them as Lucas grows.

Konny Baby Carrier

link to purchase

Easy as 1 2 3, super handy on the go or wandering around the house with baby wrapped up close to your chest. Its soft fabric is suited for babies from birth and puts no strain on their neck or shoulder. I can put it on without help from hubby and love carrying Lucas around in it.

UPPABABY Vista V2 Pram

link to purchase

This might just be my favourite baby buy yet! I did so much research when choosing the perfect pram and I couldn't be happier with my choice! The pram comes with both forward and parent-facing bassinet and reclining seat, and offers a ton of configuration options to grow with the family. It can be converted into a double pram in the future with a simple adapter. It's got great suspension and a huge storage compartment that's made all my shopping trips so easy! In my opinion, this is THE best pram on the market at this price point while being lightweight enough for me to handle.

Tutti Bambini Cozee Air Rocking Bassinet

link to purchase

This bassinet has made the setup to co-sleep with Lucas so comfortable and easy. It comes with large storage space for sheets, is well ventilated, gives us a clear view of the baby when he's sleeping and is very easy to move around the house. The tilt feature has been particularly helpful to aid with our little one’s digestion and colic problems. It can also be packed down to a portable size to take out on overnight trips so the baby can always sleep in a familiar environment.

Evereden Baby Skincare

link to purchase

Baby skincare made by mums that came from medical and dermatology backgrounds, I reckon I'm in safe hands. All the Evereden products I've tried so far are gentle on baby boy's skin. The creams are lightweight, absorbent, hydrating and fragrance-free. My favourite from the range is the Baby Massage Oil, it's like liquid gold and is absolutely beautiful and effective on dry patches and full-body massages after showers.

Ubbi Nappy Bin

link to purchase

I knew I wanted a diaper bin that is a good floor height and doesn't require me to have to buy specific bin liners because they always end up being expensive. The Ubbi is perfect, it comes with a variety of colour options and locks the unwanted diaper odours at bay with rubber seals, stainless steel body and an inventive sliding. It has a huge capacity and comes with a childproof lock mechanism on the lid. It offers all the features needed for an effective diaper disposal system and can be used as a normal rubbish bin in the future too!

Glow Baby App

link to download on iOS

I have to include a digital product on this list! The Glow Baby app is awesome and has helped heaps with my first-time-parent anxiety. It tracks your baby's sleeping, feeding, diaper changes, growth, tummy time, medicine, development...basically everything...in an easy-to-use and ecstatically pleasing app. It offers comparative insights against the thousands of babies in the community, has an in-app forum where you can connect with other mums, and predicts your baby's sleeping and feeding schedule for weeks ahead. I love the weekly reports it produces (I couldn't make better ones myself). It also offers some cool AR functions that help you store interactive baby photos and videos which is a bit extra but I reckon is pretty fun! Definitely check it out!

(This post contains affiliate links)
Share
Tweet
Pin
Share
No comments


With more than 1 billion monthly users – 500 million of which are on the app every day – Instagram is one of the most popular social media platforms in the world. Personally, I use Instagram almost on a daily basis. Even when I'm not posting content, I like to jump on that platform to look at and appreciate all the creative designs, amazing travel photos, pets and product content shared by the people I follow.
Throughout the years I've found a way to curate content for my own feed and my audience, and I've rounded up some of my top favourite apps for editing photos and videos for my Instagram posts and stories. I will show examples of how I use each app myself from the different features offered with my own images. I've also included links where you can download the apps to your phone.

Lightroom

iOS | Android | Website

If you are an Adobe user, you'd be pretty familiar with Lightroom and its incredibly comprehensive features for editing photos, and I was so glad when Adobe released it as a FREE app for mobile devices.

I almost always start with Lightroom when I edit my photos doing quick fixes on exposure, colour balancing, sizing and alignment. I also love using Presets that I've collected over the years, as they apply quick 1-click effects (like filters) bringing more life to my photos, saving me so much time. Sometimes, I also like to adjust the saturation and hues of certain colours to make them pop in photos, like the example shown below. 

Overall, I really think Lightroom should be a staple on everyone's phone with its incredible features supporting the most basic to the most complex editing needs.


Preview

iOS | Android | Website

If you are looking for a super simple app to visually plan and schedule basic posts from your phone - Preview is the perfect app for it! Although it doesn't come with all the bells and whistles of the other similar apps in its genre, it offers just enough for an everyday user delivering exactly what it came to do and nothing else! What I love about the free version of the app is that it allows you to upload and arrange unlimited posts (whereas most of it's competitors are capped at 30 per month).

You will notice on my Instagram that my feed goes through different themes that are usually grouped by colours, and that is all thanks to Preview that I am able to arrange my posts by colours to make them visually pleasing...(or maybe just for my own eyes lol).

Almost forgot to mention, the app also offers some basic stats and analytics on your post performance and engagement, which is handy.


B612

iOS | Android | Website

Ever since Snapchat, face filters are all the rage! B612 offers tons and tons of face filters, AR stickers and overlay video effects that you can apply to your photos. I mainly use this app for editing selfies and food pics. I also like using it for turning still images into short videos to mix things up. 

Try out this app and experiment with the countless face filters and stickers it offers (there are also many app updates with more filters added on a regular basis)! I promise you will have a lot of fun with it!


Over

iOS | Android | Website

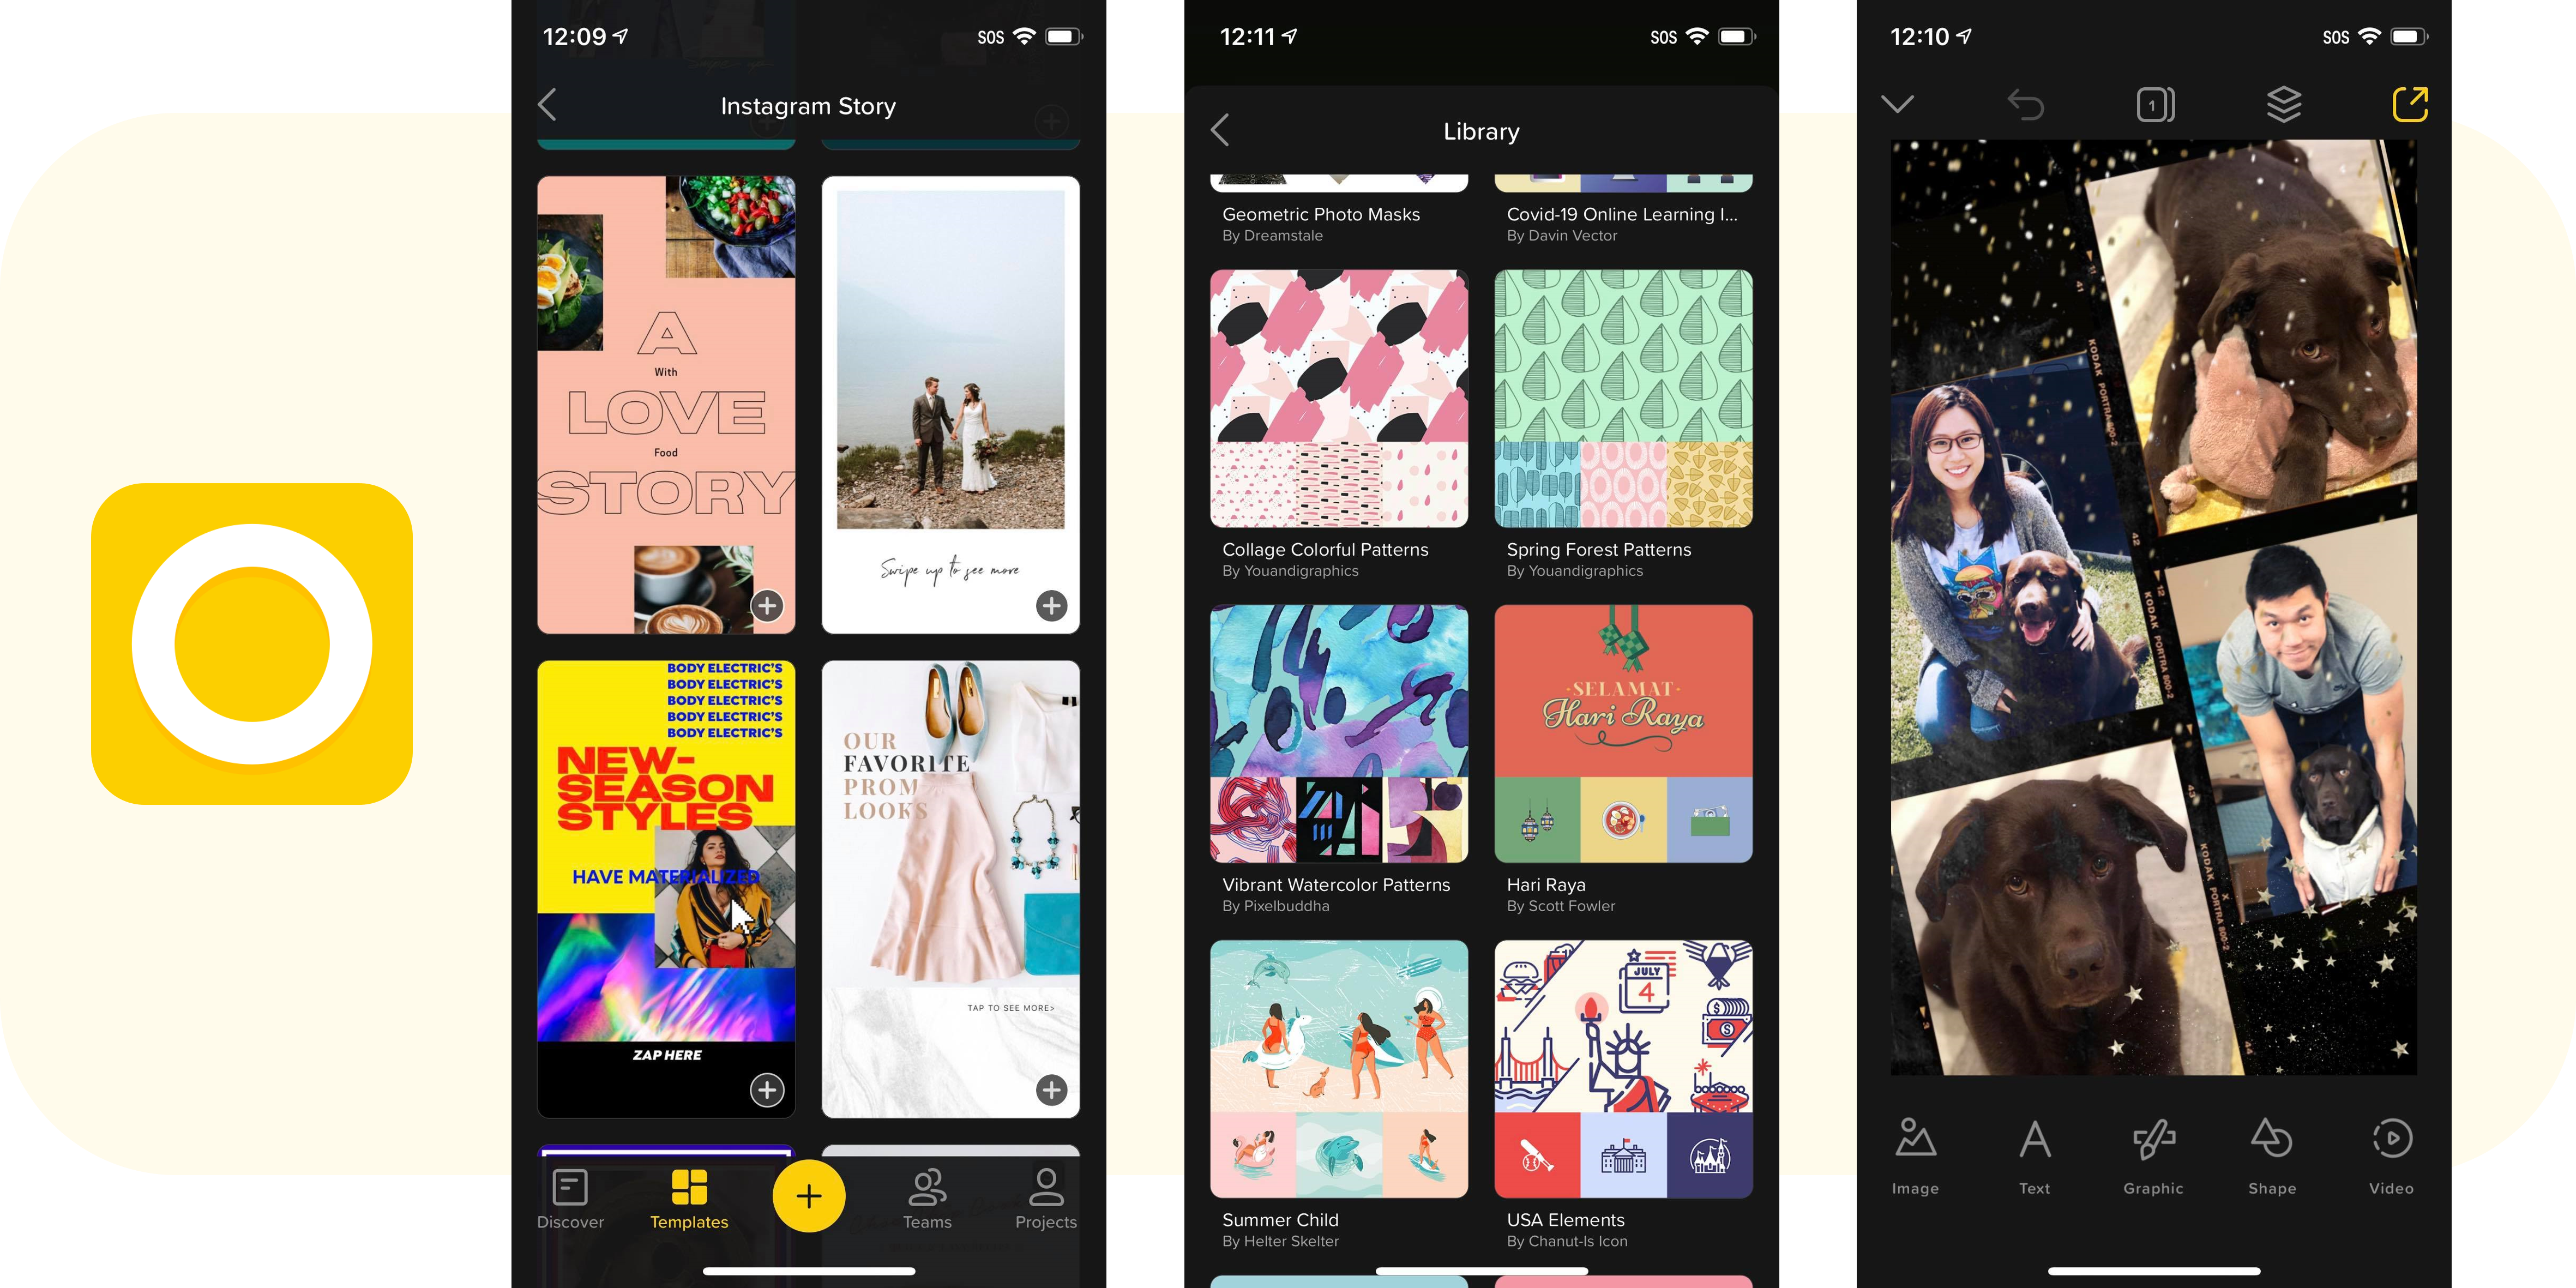
This app packs so much awesomeness and tons of resources - post, story templates, graphics, stock videos, fonts, filters - everything you will need to fulfil your design needs on your phone, even for companies that need to build a set of social assets with consistent branding and themes.

I enjoy this app so much that I'm actually a paid user so that I get access to all the pretty pre-built templates it offers. It saves me so much time just adding my own photos to these templates to create collages without the need to think about layouts, sizing, positioning, etc.


Quik

iOS | Android 

I have no talent when it comes to editing videos! Between footages, music, voice overlays, transitions and timing, I just get so confused. Luckily with this app, which I believe was originally developed for GoPro users to quickly edit footages from their GoPro devices, I can also create somewhat good videos with minimum efforts.

All you will need to do is importing all the photos and videos you want to use, the app will do the rest as it offers great options of pre-designed themes/transitions, syncing everything to the beat of the music of your choice. It can also edit videos down to the length of an Instagram story (usually 15 sec) without the need of you having to manually trim down the footages. I call it the idiot-proof video app that saves my life!


There are also other apps I use that are good for specific things when it comes to editing photos and videos, but I wanted to keep this post short and maybe I will do a 2nd edition expanding this list in the future. I hope you find this post and these apps helpful. Don't forget to follow me on Instagram @sidneyyao.


Share
Tweet
Pin
Share
No comments

Wedding invites are important as they were the 1st thing our guests received about our wedding (since we decided to skip sending SAVE THE DATE). I really wanted the invite to bring consistency and contain elements (e.g. colour palette, floral, etc) from the style of our wedding so it sets the right look, feel and tone for our wedding when our guests receive them.

Step 1 was deciding the format, and oh boy, the amount of options! I’ve looked at and seriously considered many trendy options, including tri-folds, acrylic, letterpress, round card stock, handmade paper, but in the end decided to go with a more traditional format with a twist. Well...I have to admit, I still went overboard with foiling, maroon full-colour print, line map, cursive font and everything else, but the elements that really made my invites unique were the venue graphic, floral pattern, tri-fold translucent sleeve and wax seal.

Venue Graphic

With a quick Photoshop action (i.e. magic), I was able to transform an old painting/drawing of my wedding venue, Quat Quatta, into watercolour, adding just that extra personal touch to our invite.


Floral Pattern

Flowers played the most important role at my wedding, and I knew I wanted to bring that element across to the invite. However, this is probably the piece I struggled with the most.

For reference, here is the beautiful florals from my wedding done by Bespoke Botanics; IG: @bespokebotanics
The challenge I had was finding/creating a floral pattern that represents the modern romantic Victorian style and yet doesn't give the vibe of a garden tea party. And between myself and my design team, we tried and vetoed so many designs (15 be exact!). In the end, it was this Pinterest post that saved me. I loved the floral pattern and especially the vintage feel working with the deep reds...after some digging, I found that the pattern was from a 15th century oil painting done by Melanie de Comolera. And from there, I started looking at more vintage oil paintings and finally set my eyes on one done by Jan Frans van Dael in the 17th century.


The painting had everything I was looking for - the arrangement, types of florals, style, tones and colours - it was perfect! With some 'magic'...I mean Photoshop, this quickly became the floral backing on my wedding invite.

Wax Seal

Wax seals are always the right decision! We went with a custom seal design, which was our initials combined, and 2 colours of wax - red for the invitation and gold for the placecard. I have to be honest, it wasn't an easy task doing the wax seals ourselves on the translucent wrap (it's a very slippery material), and I had tried both the glue-gun and traditional dripping methods. After practising a few times, we finally got the hang of it and nailed the timing, position, wax amount and bubble control (yup it's a thing!), but it was definitely a two-man job plus I highly recommend using baking paper as the base.
Anyways, this is how it all turned out in the end and I couldn't be happier! :)


Inspirations

Sharing some designs that really inspired me and I hope they can help you too:
  • Juliet Wedding Invitation
  • Lake Wanaka Wedding Invitation
  • Gabrielle and Dean Wedding Invitation
  • Curtly and Bronson Wedding Invitation
  • Wedding Maps/Getting There Cards
  • Vintage Floral Clip Art - Dutch
  • Minimal Invitation Suite with Translucent Cover
  • Simple White Place Card
  • Roland and Simone Wedding Invitation
  • You need to follow this Wax Seal account on Instagram...you are welcome!

Design Notes

Finally here is some additional information for all the design heads out there:
  • Sizing and Paper Stock: 
    • Main Invitation - B6 | 340gsm vellum white art board paper
    • Getting There Card - B6 | 340gsm vellum white art board paper
    • RSVP Card - A6 | 340gsm vellum white art board paper
    • A Note on Gifts Card - 11B | 340gsm vellum white art board paper
    • Translucent Wrap - custom cut | 180gsm trace paper with pre-creasing + folding
  • Printer and Design Team: Peep Designs
  • Cursive Font: Adore Calligraphy Font
  • Design Software: Adobe Creative Cloud (Photoshop, Illustrator and InDesign)
  • Gold Wax: Il Papiro
For more ideas and tips on how to plan for your wedding, check out the previous posts in my WEDDING series, here is the link.
Share
Tweet
Pin
Share
No comments

It's official. Vincent and I tied the knot in December at a beautiful ceremony, held at Quat Quatta in Melbourne. We had the most perfect day getting married surrounded by our families and loved ones! After 8 months in the planning, Vincent and I tailored a day that worked perfectly for us. Here is our big day in pictures:


The Dress

I found wedding dress shopping to be one of the most pleasant experiences of the whole wedding. Even though it seemed overwhelming at first with so many designers, styles and silhouettes out there; after trying on a few gowns from various boutiques, it didn't take me long to make the decision to go with a couture designer and custom create my gown from scratch. There is such a big difference between machine-made and hand-made - and I am all about the details!

The moment I met Ines and Mario from the Crocé & Colosimo Couture I knew I found the perfect team to make my dream gown! Ines and Mario are well sought-after designers in the industry - featured in the Foxtel TV Show 'Meet the Frockers' and are chosen designers for many celebrity brides!


I knew I wanted a transformation element in my dress (for a wardrobe change) with an edge of femininity. I was greatly inspired by the Grace Kelly-styled Dior wedding gown that Miranda Kerr wore when she married her Snapchat-founder husband Evan Spiegel. Ines and I took our ideas to the drawing board and quickly sketched up the design. In the end, we landed on a fit-and-flare silhouette and a detachable outskirt with a long train, embellished with intricate French laces on the top while keeping the skirt plain - it was absolutely perfect and everything I ever wanted for my wedding gown!

It was also a very special moment when Mario came out to dress me on my wedding day to make sure everything was perfect! The whole creative process and fitting service provided by Crocé & Colosimo Couture were 10/10 amazing!
Getting dressed by Mario from Crocé & Colosimo Couture; IG: @crocecolosimo
Wedding gown with outskirt - worn during the wedding ceremony
Wedding gown without outskirt - worn during the reception

The Shoes

I have always been a huge fan of Jimmy Choo, especially his stunning collection of wedding and evening shoes! His shoe designs are timeless but most importantly, they are comfortable too - I lasted from 10 in the morning until 11 in the night, even I was impressed!

I wanted a design that would work with both my wedding gown and Chinese tea ceremony outfit, and I couldn't be happier with the option I went with - a pair of ROMY 85 Platinum and Flamingo Ice Glitter Dégradé Fabric Pointy Toe Pumps. The glitters were surprisingly not loud; they were elegant and wedding-appropriate;  the hint of pink gradient also brought out the red from my tea ceremony dress, which I also wore at the after-party. The shoes also paired seamlessly with Vincent's black pair of DERBY shoes in burnished leather from Boss.

SHOP (exact pair & similar designs):


The Hair & Makeup

I don’t wear much makeup day-to-day and wanted my makeup to be as natural as possible for my wedding. I know warm nudes compliment my complexion whilst still giving depth and tone. My make-up artist, Beatrice Wang from Claxy, did an amazing job keeping things as natural as possible whilst making sure everything is budge-proof. My makeup held up for the whole day with minimum touch-ups, which was quite impressive considering I have oily skin.

I had previously done a trial with Beatrice so she knew exactly what I wanted in terms of my eyes, and was also totally understanding when I wanted to do certain things different like my brows. For hair, we had tried 3 different styles and it was obvious that a loose up-do suited me the most and shaped my face the best. I didn’t want to look back and regret doing too much with my make-up and hair, so we created a look that I loved whilst still feeling totally like myself.
Hair & Makeup by Claxy; IG: @claxymakeup

The Tea Ceremony

The Chinese Tea Ceremony (敬茶) is a tradition that Chinese couples go through when they wed. We had a tight schedule but made sure that we could fit the tea ceremony in the morning.

It is a tradition for the couple to give tea to the elders in the family and receive red packets; and for the mother-in-law to give the bride gold jewellery for good luck and prosperity. Our tea ceremony was truly a blessing with Vincent’s 90-year-old grandma flying all the way from Malaysia to join us.

I decided to not go with a traditional Chinese outfit (旗袍) but still wanted to wear red for my Chinese roots. I ended up wearing a design from an Australian label, Keepsake The Label, and couldn’t be happier with the outfit!


SHOP (similar designs):


The Bridesmaids

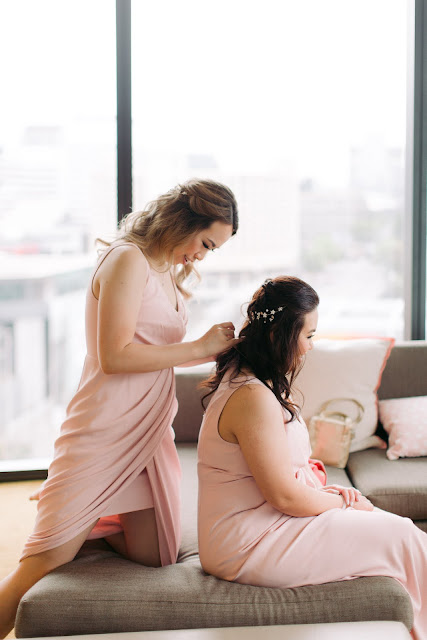
I am very lucky to have the most awesome bridal squad ever! Katherine and Priscilla stood by me, laughed with me and went above and beyond to make sure the day was perfect!

It was important to me that my bridesmaids were comfortable and happy with every aspect of their looks on the day, so I pretty much gave them free rein. They picked the dress design between them from Forever New; shoes from Carvela Kurt Geiger; and I arranged for customised robes and accessories for them. I still can’t get over how stunning they both looked in the blush and rose gold attire. Their hair and makeup were also done by the talented makeup artist from Claxy, with colours and hair accessories complimenting my look.

SHOP (similar designs):


The Flowers

Flowers are absolutely the highlights of my wedding! When I booked the venue, I knew I wanted to decorate the space with lots of fresh blooms, and my talented friends at Bespoke Botanics had much bigger plans and what they created was more than my wildest dreams!

The flowers were wild and perfect in shades of white, blush and red, cascading down the entire wall on the dance floor, and filling every corner around the venue. The altar was lined with fresh white Singapore orchids draping down to create the most beautiful backdrop. I can still remember how it felt to see and breathe it all in for the first time - it was heaven!


The bridal bouquets were made of beautiful garden roses, dahlias and peonies; they were delivered to my hotel room along with the buttonholes for the groom party and dads, corsages for the mums and collar flowers for my dog who was my ring bearer.

Bespoke Botanics did such an amazing job turning the venue into an ocean of flowers and my guests were in awe. At the end of the wedding, the guests were gifted the flowers and bouquets used for decoration. They all thought it was a nice touch to be able to take away a centrepiece of the wedding and enjoy the beautiful blooms for longer.
Cascading flower waterfall created by Bespoke Botanics; IG: @bespokebotanics

Wedding celebrant by Christine; IG: @christinecivilcelebrant

The Ride

You just gotta love a vintage two-tone Rolls Royce Silver Dawn - it makes such a classic wedding car and went really well with the style of my wedding.

Our lovely driver from Triple R was so kind and experienced. He picked up my parents and me from the hotel, drove around the beautiful Albert Park and escorted me safely from the car into the bridal suite. The service he provided was outstanding; he was even giving the photographers tips on the best angle to shoot the vehicle.
Wedding ride by TripleR Luxury Car Hire; IG: @triplercars

The Ring Bearer

Ok, I was a little nervous about this one. Vincent and I consider Loki, our chocolate Labrador, as family, and wanted him to be part of the big day. We wanted to give Loki the ring bearer duty for our ceremony, but we weren't sure how he will cope with being around a big group of people and loud music. I ordered a special wedding dog collar, in Tiffany blue, and a ring attachment for him to carry our wedding band securely on his neck.

Luckily Loki acted like a champion, happily strutting down the aisle with a big smile on his face and delivered the wedding bands successfully. I will cherish this memory forever and am so glad he played such an important role on our wedding!


The Food & Dessert

For our wedding food, we wanted festive and give our guests lots of options, so we provided cocktail bites, roving options for the main and sides, as well as a whole dessert table full of little desserts, including cake popsicles, chocolate pyramids, cake squares, macrons and mini doughnuts. They were prepared along with my strawberry and buttercream wedding cake by Pretty Sweet Cake Design.

The creative Moonshot Balloons also created an awesome balloon garland to frame the dessert table. The desserts were a big hit with the children (and adults) at the wedding.
Balloon garland by Moonshot Balloons; Wedding cake & desserts by IG: @Pretty Sweet Cake Design

The Botanical Gardens

Quat Quatta provided the most beautiful Victorian-era architecture and landscape for our ceremony and reception! Because we did a lunch reception and the venue was so close to the St Kilda Botanical Gardens we decided to go there afterwards when the sun is still out for another photo-shoot, and it was the best decision!

The St Kilda Botanical Gardens offered the most stunning backdrops for our photos. From the Rose Garden to the Glass House and lush lawns and palm trees, every corner we turned had a romantic and unique setting.


The After Party

The advantage of doing a lunch reception is that you will have time for an after-party in the night, and that is exactly what we did! There are tons of good restaurants and bars around St Kilda, and we found the most relaxing place upon my best friend's recommendation, right by the beach.

We kept our after-party an intimate event with just family and our closest friends. Captain Baxter, offered a great tapas menu and a huge range of beverage options.


Vincent and I felt extremely lucky to have had the most perfect wedding and got to celebrate with the most loving bunch of people! The day couldn't have gone any better and I already miss it so much! From the bottom of our hearts, thank you to everyone who helped make our big day so special and memorable!


For more ideas and tips on how to plan for your wedding, check out the previous posts in my WEDDING series, here is the link.
(This post contains affiliate links)
Share
Tweet
Pin
Share
1 comments
Older Posts

About Me

About Me
Hello there, my name is Sidney. I'm a blogger, creator, marketer and coffee-lover from Australia. I started blogging as a fun hobby a few years ago and soon I’ve been blogging-obsessed ever since, sharing all my latest obsessions on all things Designs, Games, Technology and Lifestyle with the world. Thanks for stopping by my site. I'm very proud of the content I create and I hope you find some of it helpful or entertaining. Enjoy your stay.

Get Social

  • instagram
  • twitter
  • pinterest

Labels

  • lifestyle
  • printables
Powered by Blogger.

Pinterest

I'm on Pinterest!
Instagram Twitter Pinterest Bloglovin Email

Created with by Sidney Yao and Sidney Yao